Saturday, December 22, 2012

MAKE YOUR OWN BROWN SUGAR AT HOME!

 Homemade Brown Sugar Recipe


The perks to making your own is you can control how much you make, which means added freshness and you won't have to worry about the sugar hardening!
 
Serves: 1 cup
 
 
Ingredients
  • 1 Cup of Sugar
  • 2 Tablespoons of Molasses
Instructions
  1. Mix the two ingredients together.
  2. Takes about 2 minutes.
  3. Use and store like normal brown sugar.
  4. Enjoy

Organizing Your Car

Cluttered car syndrome is a common plague affecting many different types of people. Commuters, soccer moms, students, even people who just drive to the post office and pharmacy can have a disorganized car interior. Overtime, the inside of your car can get filled with important things and junk alike – ranging from bank statements to leftover McDonald’s from the last time you hit the drive-thru. Setting aside an hour or so, (depending on the severity of the clutter) to tackle the cluttered car can make easily decrease stress while driving, and make for more passenger and cargo room.

Follow these steps:

1. Park your car in a well-lit spot-- make sure you have plenty of light to see into all the nooks and crannies of your car. If you have tinted privacy windows, roll them down to allow light in.

2. Gather 3 boxes in total--depending on how much clutter you have in the car, you may need small shoebox-size boxes, or boxes larger than a standard suitcase. Label one “Keep in Car”, another “Keep in House”, and finally one “Trash”. Optionally, you can line the trash box with a garbage bag to make tossing out easier. Bring out the recycle bin if you think you’ll have a lot of papers, bottles, or boxes to recycle.

3. Remove everything from the car. Start wherever you want, keeping in mind that the trunk is a very common hotspot for clutter, as well as pouches on the back of seats, the glove compartment, and center consoles and door slots. Clear everything out, sorting items into the appropriate boxes.

4. Take the opportunity of having a car free of items to clean the interior well. Vacuum the seats and floors, shake the floor mats, and wipe down surfaces such as the steering wheel and door handles. You can also spray air freshener, or add a hanging air freshener to your car to rid it of any unwanted odors that can accumulate over time. If your car has an ash tray, filling it with baking soda also helps to prevent further smells from lingering.

5. Place everything that belongs in the car, in the car. Make homes for things that should remain in the car--placing tools, etc in one bin in your trunk is a great start. Ensure that you have all important vehicle information, such as registration and insurance papers, in an easy-to-reach location. Put things where they will make the most sense to you, and arrange them neatly.

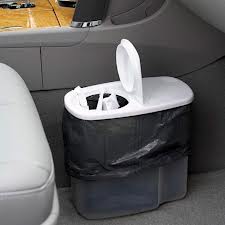
Always have a bag or container on hand for trash--a plastic cereal container is a great alternative as well!

If you have children, cutting a yoga mat (generally close to the colour of your upholstery) to size and laying over the backseat prevents any permament stains, and crumbs can be easily swept off!

6. Set rules for your family or anyone that may be riding on a regular basis and STICK TO THEM! If you say 'no eating in the car,' be persistent.
Stick to a regular car decluttering schedule to avoid buildup of clutter.

Wednesday, December 19, 2012

Tip of the Day # 131: Knife Safety

BASIC KNIFE SAFETY


Keep the finger tips of your non-knife hand tucked firmly back and firmly against the food. The knife should be guided by the flat part of your fingers between the second and third knuckles of the non-knife hand. Yes, that’s right – the safest way to use a knife actually involves letting it rest against your other hand. See how my thumb is sticking out in this picture? It’s that way because it’s squeezing the onion layers together, but that positioning is not ideal. A moment of inattention and that thumb could creep forward and could slice the tip of your thumb off!

Tip of the Day # 130: Dicing Onions Properly

 How to Properly Dice an Onion--and quickly!!!

Many people have a problem when it comes to properly dicing or cutting certain vegetables, and the following technique will assist you in cutting veggies, such as an onion, more efficiently!
This tutorial may seem lengthy, but when completely in reality, you will be able to cut like a pro!

1. Get your onion. Peel it, and trim the root end flush but don’t carve it out. The stem will help hold the onion layers together as you cut.

2. Cut your onion in half. We’ll dice one-half at a time. Note the stem, still holding together most of the onion layers.

3.  We’re going to cut radial slices around the onion half without cutting through the stem. Picture the spokes of a bicycle tire. Now picture it’s just half a tire, with all the spokes radiating outward from the center. If you can imagine cutting along imaginary spokes as you slice your onion, this technique will be a cinch.

The first cut will be at a very shallow angle.

4.  The next will be slightly less shallow as you slice your way towards the top of the onion.


5.   Remember not to to cut through the stem – stop your slices 1/2-inch or so shy of the root end.

6.  By the time you are slicing down through the center (apex) of the onion, your knife should be vertical.

7.  Slice your way down the other side of the onion, making increasingly shallow cuts as you approach the cutting board on the other side.

8.  Now, turn your onion 90-degrees so that you can hold the root end firmly in your left (or non-knife) hand while slicing down and perpendicular to the radial slices you just made.

9.  As you slice down, tidy little diced onion pieces will fall from your knife.
The onion will try to splay apart as you cut down. You have to use your non-knife hand to hold the onion together. My thumb and fingers spread out a bit down the sides of the onion to hold all the layers together.


Friday, December 14, 2012

Tip of the Day # 129: Hanging Bath Mats

Hang your bath mat on a pants hanger to prevent stinky mildew.

Tip of the Day # 126: Shining Glassware

To shine glassware, pour 1 cup of white vinegar into your dishwater. Let items sit for 20 minutes, scrub clean, then wipe dry with a soft cloth.

Tips of the Day # 128: The writings on the Mirror!

Don't our best ideas or reminders come to us while in the shower or getting ready for the day?? Keep a dry erase marker in the medicine cabinet so you can write reminder notes or your To-Do list on the mirror!