Sunday, April 21, 2013

Organizing your Closet

To begin, I always tell people that if something seems too overwhelming or time consuming, to start out small. For instance, try the hall closet first to build your confidence and find what works best for YOU.

Step 1: Begin by selecting your messiest closet and removing its contents. During this process, take a good look at what you have and consider donating or tossing items that have not been touched in years. You have to remember these items are taking up VALUBLE storage space. Be honest with yourself and make the effort to purge the old, the size-challenged, and the "what was I thinking?" . If you can't bring yourself to part with some of these items (even though you know that you should) box them up, put the date on the box and store it in the basement or attic. If you haven't touched the box in one year toss or donate it without opening as this will leave you second guessing your initial decision.

Step 2: Now it's time to put away the items you have decided to keep. As you put things back, keep like things together (for example long-sleeved shirts) and remember to store items based on how they are used as well as their frequency of use. Placement is important -- store special occasion dressings in the back , while frequently worn items should be up front and between shoulder and knee height. I also hang by colour--it may seem tedoous at first, but once complete, it is so nice to find a specific article of clothing easily when you are in a rush! Now, don't forget about the floor space under your short hanging items. Purchase clear containers or the white & clear plastic drawers and store out of season sweaters and shoes (no, not together); don't forget to label, so next year there will be no unnecessary dumping. If you are storing sweaters or non-hang shirts on your top shelf consider shelf dividers; these keep those stacks from tumbling into one another, which ALWAYS seems to happen!

Step 3: Finally consider ways to maximize the space you have. The back of the closet door provides some wonderful untouched storage space. Add dollar store hooks for robes and your comfy sweats or suit jackets if you plan to wear it again soon.Another storage option is hatboxes (or make your own by covering boxes in scrapbook paper); they are great for storing small accessories and look really nice on your shelf or neatly stacked on the floor.

Step 4: What you hang your clothes on really does make a difference. All your hangers should be the same type (yes -- get rid of those wire hangers from the dry cleaners). Replacing hangers can be as costly or as inexpensive as your taste and budget dictate. You can pick up a pack of nice WOOD hangers at the dollar store. You have gone through all this effort to make things organized and this last detail can really pull it all together and looks so much nicer; which will be more rewarding in the end.
I am often asked, "What should I do to organize my hats, belts and scarves" and I always have the same answer--use dollar store plastic shower rings, loop your items through and hang on a hanger. They stay in place, and look so neat when hung in the closet.
There is no need to spend a lot of money on organization when items from your local dollar store are beautiful and serve the same purpose!

Once everything has a place and fits, you are encouraged to keep it organized and clutter free. Maintenance is KEY and will only require minimal effort if completed daily or when necessary. A few minutes of hanging, folding and tossing in the designated basket keeps everything in its place.
I always encourage people to use the rule: if you purchase a new article of clothing, another must go. This ensures your newly organized closet never becomes too full or crammed, which oftens turns back into MESSY!

WOOLZIES CONTEST WINNER!!

Our contest for a FREE BOX OF WOOLZIES DRYER BALLS has come to an end! Thank you to all who participated and entered! :)

Now for the winner!

Drum roll..........
.....
....
...
..
.
TRACEY SAUNDERS MARSHALL!!!!

Congratulations!!!!!!!

You will be receiving an email shortly :)

Have a great Sunday everyone!!!

Saturday, April 20, 2013

Tip of the Day #302: The Lowdown on Essential Oils

Not only do essential oils fill a room with a wonderful aroma, but they are considered to possess certain qualities or serve special purposes when used properly. Find out what your favourites can do for you below:

SOOTHING:
chamomile
rose
jasmine
clary sage
geranium
sandalwood
vanilla
musk
nutmeg

ENERGIZING:
lemon
eucalyptus
pine
citrus
bergamot
peppermint
rosemary
cinnamon

APHRODISIACS:
clary sage
geranium
sandalwood
ylang-ylang
lavender

SPIRIT LIFTERS:
neroli
bergamot
rosemary

MENTAL STIMULANTS:
clary sage
Juniper berry
pine
peppermint

MUSCLE RELAXANTS:
vasmine
vanilla
musk
eucalyptus
peppermint

If you are unfamiliar with essential oils, you can pick them up at your local health store!

Friday, April 19, 2013

Tip of the Day #301: Tabs on Aluminum Foil Box

It sounds silly, but many of us have experienced what are supposed to be simple tasks, but end up being a lot more complicated every time you do it--for example, trying to tear a sheet of aluminum foil out of the box without pulling the entire roll out! Well, check the ends of your aluminum foil or saran wrap boxes for a handy little circle or triangle. If you punch it in, it will hold the roll in the box and prevent it from popping out when you rip off a piece!

Another quick tip - placing your plastic wrap in the refrigerator will make it easier to handle :)

Thursday, April 18, 2013

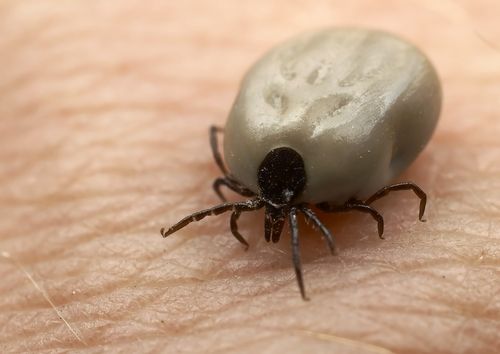
Tip of the Day #300: Preventing Ticks

How to Prevent Ticks on your Pets:

1. Garlic –given as a dietary supplement makes your animal less appealing to ticks. The smell is excreted through the skin and repels both ticks and fleas. However, garlic contain sulfoxides and disulfides, which can damage red blood cells and cause anemia in dogs. If you use garlic as your tick prevention, use it SPARINGLY.

2. Apple Cider Vinegar – Apple cider vinegar adds acidity to your pet’s blood, making it less appealing to ticks and fleas. Add 2 tablespoons of the apple cider vinegar to the his or her food or water bowl as a preventative.

Prevention on Humans:

1. Always wear an insect repellant of at least 20% DEET whenever outside

2  Dress in light-coloured clothing! When coming inside, place your clothing for 10 minutes in the dryer on the hottest setting--it will kill any ticks that may be lingering. 

Wednesday, April 17, 2013

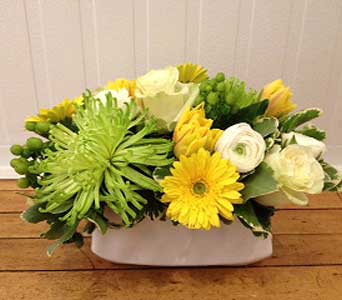
Tip of the Day #299: Keeping Flowers FRESH

A fresh bouquet of flowers will brighten up any room, especially if they last. Surprisingly, a number of household items will help do the trick. Here are a few interesting products and tips that can help your blooms stay fresh longer:

1. Cut your stems with a knife instead of scissors. The gauge on scissors is set for paper or fabric, not for flower stems, which are bulkier. Using scissors will crush their vascular systems and prevent proper water uptake.
2. What you put in your water makes a world of difference!
A) Dissolved aspirin is a tried and true method to keeping your flowers fresh, but lemon-lime soda can work too. Mix one part of the soda with three parts water. Then add 1/4 teaspoon of household bleach per quart, which will help the water stay clear.
B) Lemon juice is another great ingredient to put in your vase. Mix 2 teaspoons of lemon juice with 1 tablespoon of sugar and 1/4 teaspoon of bleach in a quart of warm water. Another 1/4 teaspoon of bleach can be added to the vase water every four days.
C) One of the strangest products that will help your bouquet last is Listerine. According to Plantea.com, just 2 ounces of the mouthwash added to every gallon of water will act as plant food and create a bacteria-fighting environment for the flowers. It's also acidic like many of the other solutions, which helps the water to move up cut stems.

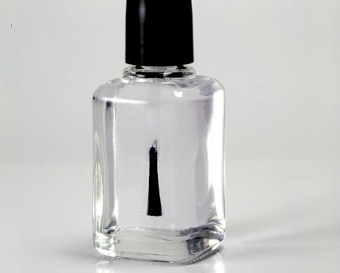
Tip of the Day #298: Uses for Clear Nail Polish

We all know clear nail polish can do a great job on a manicure, but many of you may not know the other wonderful and useful benefits it posseses! It can aid in:

1. Making jewelry last. To extend the life of costume jewelry and to keep it looking bright and glossy, give beads a thin layer of polish. It helps prevent fading and tarnishing. It also helps your fingers turning green from rings!

2. Sealing envelopes. In lieu of licking the envelope flaps to seal them (not only can this be ineffective, but does anyone find that taste as gross as I do?) dab on a little polish to keep them glued nice and tight. 

3. Threading needles. Rather than get frustrated when attempting to thread a needle, run the cut side of the thread through the polish brush. Roll the thread between your fingers a couple times; the polish will dry pretty much immediately and the thread becomes stiffer (and much more easy to get through the eye of the needle). 

4. Keeping belt buckles pristine. To ensure belt buckles stay bright and shiny, shellac them with a coat of polish to prevent oxidation.

5. Securing buttons. Brush on a dollop of polish in the center of your buttons to keep the threads from coming undone. If you have a sweater or dress with delicate pearly buttons, give the whole thing a coat of polish to keep them luminous. 

6.Fixing window screens or shades. If you have a tear or small hole in a window shade or screen, paint on some polish to keep it from getting worse. 

7. Waterproofing matches. As any camper can attest, there are few bigger drags than a box of soggy matches. To waterproof them, paint the flammable tips with polish. 

8. Wood floor repairs. A bit of clear polish is fantastic to touch-up minor dents and little scuffs on wood floors.

9. Avoiding rust stains. You know those rust rings that form on your tub if you leave shaving cream in the shower? Just varnish the underside of the can with a little polish to keep the metal from staining. 

10. Shoelace protector. To stop shoelaces from unraveling and fraying, dip the ends in clear polish.